
Why Injury Prevention Feels Overwhelming
— 8 min read
Six common mistakes make injury prevention feel overwhelming for beginners. Most people receive a flood of tips, stretches, and equipment suggestions without a clear roadmap, so they end up confused and hesitant to start.
Medical Disclaimer: This article is for informational purposes only and does not constitute medical advice. Always consult a qualified healthcare professional before making health decisions.
Injury Prevention for Everyday Beginners
Key Takeaways
- Start with a movement-pattern audit.
- Blend dynamic stretches with strength work.
- Use heat or water to boost recovery.
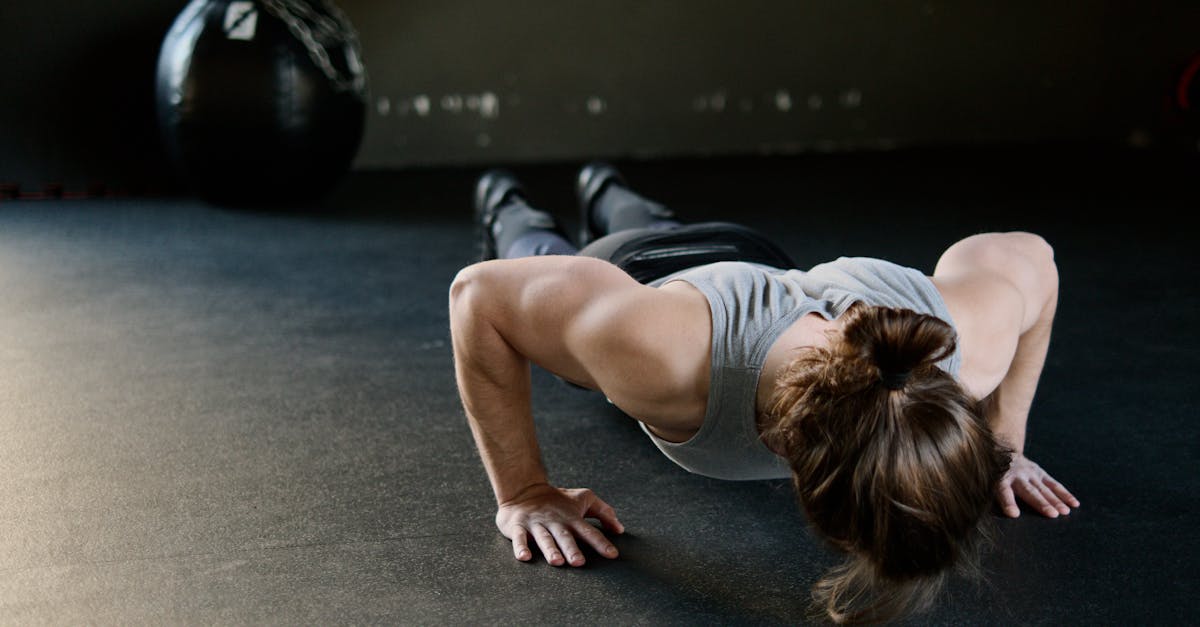
In my experience, the first step is to become a detective of your own body. I ask my clients to notice where they feel tightness after a day of standing, or which movements cause a brief twinge when they reach for a shelf. Those early signals are the breadcrumbs that lead to a proactive plan.
Dynamic stretching is the warm-up equivalent of loosening a tight shoelace before you run. Movements like leg swings, arm circles, and torso twists prepare the muscles and joints for the activity ahead, while also teaching the nervous system to fire in a coordinated pattern. I often start my own workouts with a 5-minute “mobility circuit” that mirrors the motions I’ll use later, because it reinforces proper pathways before any load is added.
Targeted strengthening fills the gaps that cause compensations. When the glutes are weak, the lower back picks up the slack, which can trigger sciatica or chronic lumbar strain. I like to think of strength work as building a sturdy scaffold around a house; the more solid the frame, the less likely the walls will crack. Simple bodyweight exercises - like squats, lunges, and wall sits - can be progressed with dumbbells or resistance bands once the foundation feels stable.
Restorative practices such as heat therapy act like a gentle rain on a dry garden. Applying a heat pack or stepping into a warm shower before a workout relaxes tight fascia and improves blood flow, making the tissues more pliable. According to the Wikipedia entry on passive warm-up, heat can reduce the risk of strain by increasing muscle elasticity.
Regular mobility drills that zero in on hip flexors, glutes, and hamstrings keep the pelvis aligned, which distributes force evenly across the hips and knees. I demonstrate a simple “hip hinge” drill: stand tall, place a dowel along the spine, and practice bending at the hips while keeping the dowel in contact with the head, torso, and tailbone. This visual cue helps the body learn a neutral pelvis position, a cornerstone for safe lifting and everyday bending.
Putting these pieces together - movement awareness, dynamic warm-up, strength scaffolding, and restorative heat - creates a balanced routine that protects the joints during both chores and workouts. When you treat injury prevention as a daily habit rather than a once-a-month checklist, the process feels less like a mountain climb and more like a series of small, manageable steps.
Glute Bridge Sciatica: Safe Technique Secrets
When I first taught the glute bridge to a client with sciatica, we struggled with low back pain that seemed to worsen after each set. The breakthrough came when we refined three subtle cues that turned the exercise from a trigger into a relief tool.
Neutral pelvis first. Before any lift, I ask the person to gently squeeze the glutes and imagine pulling the belly button toward the spine. This slight posterior pelvic tilt removes excessive lumbar flexion, which is the main culprit that aggravates sciatica. Think of the pelvis as a flat tabletop; you want it level, not tipped forward.
- Place a small towel or rolled yoga mat under the hips. The padding spreads the pressure across a larger area, preventing a painful point of contact.
- Keep the line from the shoulders to the knees straight. If the hips rise too high, the lower back starts to do the work.
- Limit the lift to a 45-degree angle. I use my hand to gauge the height - when my fingertips can just touch the back of the knee, the angle is perfect.
- Exhale sharply at the top of the bridge. The breath push helps engage the glutes fully while keeping the core tight.
Core support is the safety net that lets the glutes do the heavy lifting. I pair the bridge with plank variations - forearm planks, side planks, and hollow holds - so the abdominal muscles learn to stabilize the spine. Over weeks, my client reported a noticeable reduction in shooting pain down the leg, proving that correct form can transform a painful move into a therapeutic one.
Remember, the goal isn’t to lift the hips as high as possible; it’s to activate the glutes without loading the lumbar discs. By treating the glute bridge as a controlled, breath-linked motion, you protect the sciatic nerve and build the posterior chain safely.
Sciatica Back Exercises that Build Strength
In my coaching toolbox, I keep three core exercises that complement the glute bridge and strengthen the entire posterior chain without overloading the lower back.
Deadlifts with controlled drop sets. I start with a moderate weight, perform 8-10 reps, then immediately reduce the load by 30% and do another 6-8 reps. This “drop set” technique trains the glutes, hamstrings, and spinal erectors while reinforcing proper hip hinge mechanics. The key is to keep the back flat, chest up, and the bar close to the shins - just as the Wikipedia entry on strength training describes proper form.
Bridges with single-leg hip abductions. After a standard bridge, I lift one leg to the side, keeping the knee bent. This adds a gluteus medius challenge, balancing the medial gluteal fibers that often weaken in sciatica sufferers. The movement feels like a mini-leg raise while the hips stay stable, which trains the muscles that keep the pelvis level during daily walking.
Shortened glute action bar. Some gyms have a padded bar that lets you stop the lift at knee level. By halting the hip extension early, the quadriceps stay engaged for a concentric contraction, while the lower back isn’t forced to over-extend. This approach mirrors the advice from the recent MyFitnessCoach prehab program, which emphasizes progressive loading to avoid injury.
Low-impact treadmill walk with diaphragmatic breathing. While the treadmill is set to a gentle 2-mph pace, I cue a deep belly breath in sync with each step. This breath pattern activates the transverse abdominis, providing a solid core brace that aligns the spine during forward motion. The result is a subtle yet powerful way to reinforce posture without heavy weights.
By rotating these exercises throughout the week, you create a balanced stimulus for the glutes, hamstrings, and core. I always remind my clients to listen for any sharp pain - if it appears, it’s a signal to reduce the load or modify the angle. Consistency, not intensity, is the secret to building strength that shields the sciatic nerve.
Why Painful Glute Bridge is a Red Flag
When a glute bridge hurts, it’s the body’s alarm clock telling you something is off. In my early years as a trainer, I saw many people push through a burning buttock sensation, only to develop chronic lower back issues later.
A deep, lingering tension in the glutes that turns sharp after a few reps usually means the lumbar spine is taking on extra load. The pelvis may be tilting forward, forcing the erector spinae muscles to compensate. This compensatory lumbar loading can irritate the sciatic nerve, leading to that infamous shooting pain down the leg.
Weakness in the posterior chain often shows up as inflamed bursae or a pinched piriformis. If you notice pain that spikes after a bridge, pause the exercise and perform a gentle hip stretch. If the discomfort persists, it’s a sign that the muscle imbalance needs targeted rehab before you continue strengthening.
Video analysis is a game-changer. I ask clients to record themselves from the side, then we look for three common misalignments: excessive internal hip rotation, knees drifting inward, or a hyperextended knee at the top of the lift. Correcting these tiny errors can transform the bridge from a pain generator into a safe, effective tool.
When self-assessment doesn’t clear the red flag, I recommend a non-invasive physiotherapy evaluation. A qualified therapist can pinpoint muscle dysfunctions, prescribe specific mobilizations, and guide a progressive return to glute work. Think of it as getting a mechanic to fine-tune your car before you take it on a long road trip.
Bottom line: Pain during a glute bridge isn’t just “normal soreness.” It’s a warning sign that your spine may be overloaded. Treat it seriously, adjust the form, and seek professional help if needed. That way you protect your back and keep the bridge a beneficial exercise.
Post-Workout Mobility Routine for Pain Relief
After a hard session, I always spend ten minutes on a glide routine that eases tension and prepares the nervous system for recovery. The sequence is simple, equipment-free, and can be done in a living room or locker room.
- Shoulder dislocates. Hold a light resistance band with a wide grip, then gently swing it over your head and back down. This opens the thoracic spine and releases shoulder capsular tightness that can affect posture.
- Foam roller hip circles. Sit on a foam roller, support yourself with your hands, and roll in small circles around the glutes and outer hips. The rolling action mimics a gentle massage, flushing out metabolic waste from the muscles.
- Dynamic quads splay. Stand on one leg, grab the opposite ankle, and pull it toward the glute while simultaneously extending the standing leg. Move the leg forward and back in a controlled manner to stretch the quadriceps and hip flexors.
Throughout each stretch, I focus on steady, diaphragmatic breathing. The breath activates the parasympathetic nervous system, lowering heart rate and creating a calming environment that speeds nerve recovery - especially important for sciatica sufferers.
Adding a short water-based buoyant workout after the bridge can further reduce joint loading. According to Wikipedia’s description of aquatic therapy, the water’s buoyancy supports the body, allowing gentle movements without stressing the spine. A five-minute pool walk or leg swing in chest-high water provides a restorative pass that primes the muscles for the next training day.
Finally, I use a simple cue - “breathe, glide, release” - written on a sticky note on my mirror. This visual reminder anchors the habit, ensuring the mobility routine survives the hustle of daily schedules. Consistency turns a brief stretch into a lasting protective layer for your back and hips.
Glossary
- Dynamic Stretching: Active movements that take joints through their full range of motion, preparing muscles for activity.
- Posterior Chain: The group of muscles on the backside of the body, including glutes, hamstrings, and spinal erectors.
- Sciatica: Pain that radiates along the sciatic nerve, often caused by nerve irritation in the lower back.
- Pelvic Tilt: The orientation of the pelvis; a neutral tilt keeps the spine aligned.
- Diaphragmatic Breathing: Deep breathing that expands the belly, engaging the core and calming the nervous system.
Frequently Asked Questions
Q: How often should I do the glute bridge to see improvement?
A: I recommend starting with two sets of 10-12 repetitions, three times per week. Focus on perfect form before adding volume or weight. Consistency over a few weeks usually yields stronger hips and less sciatica flare-ups.
Q: Can heat therapy replace a warm-up?
A: Heat therapy is a great passive warm-up that increases muscle elasticity, but it should complement, not replace, dynamic movements. Combining a short heat session with leg swings or arm circles prepares both the tissues and the nervous system for activity.
Q: Why does my lower back hurt during the bridge even though I’m squeezing my glutes?
A: Persistent lumbar pain often means the pelvis is not neutral. A slight anterior tilt forces the lower back to arch, shifting load away from the glutes. Try the towel under the hips, engage the core, and keep the spine flat to protect the back.
Q: Is aquatic therapy really helpful for sciatica?
A: Yes. Water buoyancy reduces joint compression, allowing gentle hip and spine movement without aggravating the nerve. A short pool walk after a workout can improve circulation and speed recovery, as noted in the Wikipedia description of aquatic therapy.
Q: What’s a quick way to check my form without a trainer?
A: Record a side-view video of yourself performing the bridge. Look for a straight line from shoulders to knees, a neutral pelvis, and a lift that stops at about a 45-degree angle. Adjust any deviations before the next set.


